
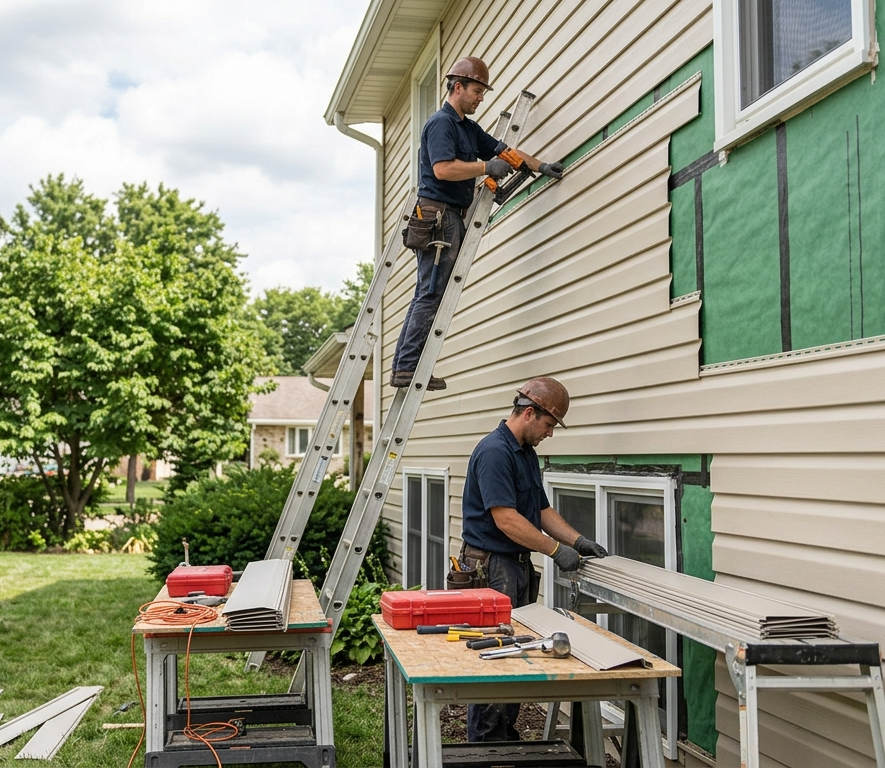
How to Install Vinyl Siding | Step-by-Step DIY Guide (2026)
Vinyl siding is one of the most popular exterior cladding materials for homes. It offers durability, affordability, low maintenance, and excellent curb appeal. Moreover, modern vinyl siding comes in various colors and styles, making it a versatile choice for homeowners. If you’re planning a siding project, understanding how to install vinyl siding correctly can help you achieve professional-looking results and long-lasting protection.
This guide explains the tools, materials, preparation steps, and installation process in detail.
Why Choose Vinyl Siding?
Before starting installation, it’s important to understand why many homeowners prefer vinyl siding.
Key benefits include:
- Affordable compared to many alternatives
- Low maintenance requirements
- Resistance to moisture and insects
- Wide range of colors and textures
- Long lifespan
- Improved curb appeal
Additionally, vinyl siding does not require frequent painting, which helps reduce maintenance costs over time.
Tools and Materials Needed
Gather all necessary tools before beginning the project.
Essential Tools
- Tape measure
- Level
- Circular saw or tin snips
- Utility knife
- Hammer
- Chalk line
- Ladder
- Safety glasses
- Work gloves
Materials
- Vinyl siding panels
- Starter strips
- J-channel trim
- Corner posts
- House wrap
- Corrosion-resistant nails
- Utility trim
Having the right materials ensures a smoother installation process and better results.
Step 1: Prepare the Exterior Wall
Proper preparation is critical for successful vinyl siding installation.
First, inspect the exterior walls carefully. Then, remove old siding, loose paint, damaged wood, and protruding nails.
Next, repair any structural damage before proceeding.
Additionally, ensure the wall surface is flat and clean. Uneven surfaces can create visible imperfections after installation.
Step 2: Install House Wrap
After preparing the wall, install a weather-resistant house wrap.
House wrap serves several important functions:
- Improves moisture protection
- Enhances energy efficiency
- Reduces air infiltration
- Protects wall sheathing
Start at the bottom of the wall and work upward. Furthermore, overlap each row according to the manufacturer’s recommendations to create a continuous moisture barrier.
Step 3: Install Corner Posts
Corner posts create clean edges and provide attachment points for siding panels.
Installation Process
- Position the corner post at the building corner.
- Leave a small gap at the top for expansion.
- Secure the post with corrosion-resistant nails.
- Ensure the post remains perfectly plumb.
Use a level throughout the process because accurate alignment affects the entire installation.
Step 4: Install the Starter Strip
The starter strip supports the first row of siding.
Begin by marking a level reference line around the house. Then, attach the starter strip along that line.
Make sure the strip remains level from end to end. Otherwise, the siding rows may appear uneven as the installation progresses.
Step 5: Install J-Channel Around Openings
J-channel trim surrounds:
- Windows
- Doors
- Roof intersections
- Other openings
This trim helps direct water away from the structure while providing a finished appearance.
Cut each section carefully and allow slight gaps for expansion and contraction. Consequently, the siding system can move naturally during temperature changes.
Step 6: Install the First Siding Panel
Now you can begin installing the siding panels.
How to Install the First Row
- Hook the bottom edge into the starter strip.
- Slide the panel into the corner post.
- Confirm proper alignment.
- Nail through the center of each nailing slot.
Importantly, do not drive nails tightly against the siding.
Instead, leave approximately 1/32 inch of space between the nail head and panel. This gap allows the siding to expand and contract freely.
Step 7: Continue Installing Additional Rows
After securing the first row, continue upward.
Each panel locks into the panel below it. Therefore, ensure every section snaps securely into place before fastening.
Additionally:
- Stagger panel seams when possible.
- Check alignment frequently.
- Leave expansion gaps at corners and trim pieces.
- Maintain consistent spacing.
As a result, the finished exterior will look more professional and uniform.
Step 8: Cut Panels Around Windows and Doors
Most installations require custom cuts around openings.
Cutting Tips
- Measure carefully before cutting.
- Use a utility knife for simple cuts.
- Use tin snips for detailed trimming.
- Double-check dimensions before installation.
Then, fit the cut panel into the surrounding J-channel for a clean finish.
Accurate cuts significantly improve the appearance of the completed project.
Step 9: Install the Top Row
The final row often requires trimming to fit beneath the soffit or roofline.
First, measure the remaining space. Next, cut the siding panel to the correct width.
Then, install utility trim along the top edge and snap the final panel securely into place.
This step creates a neat, finished appearance while maintaining proper support.
Common Vinyl Siding Installation Mistakes
Many DIY installers encounter avoidable problems.
Avoid these common mistakes:
Nailing Too Tight
Tight nails prevent expansion and contraction. Consequently, the siding may buckle or warp.
Ignoring Expansion Gaps
Vinyl expands in warm weather and contracts in cold weather. Therefore, leave adequate space at all trim connections.
Uneven Starter Strips
A crooked starter strip affects every row above it. Always verify level measurements before installation.
Poor Moisture Protection
Skipping house wrap can allow water infiltration and structural damage over time.
Vinyl Siding Maintenance Tips
Although vinyl siding requires little maintenance, regular care extends its lifespan.
Recommended Maintenance
- Wash siding annually
- Inspect for loose panels
- Check trim components
- Remove mold and mildew promptly
- Keep gutters functioning properly
Furthermore, routine inspections help identify small issues before they become major repairs.
Final Thoughts
Learning how to install vinyl siding can save money while improving your home’s appearance and protection. By preparing the walls properly, installing moisture barriers, securing trim pieces correctly, and allowing room for expansion, you can achieve durable and attractive results. Additionally, following manufacturer guidelines and avoiding common installation mistakes will help ensure your vinyl siding performs effectively for decades.
Frequently Asked Questions (FAQs)
1. Can I install vinyl siding myself?
Yes. Many homeowners successfully install vinyl siding themselves, provided they have the proper tools, preparation, and attention to detail.
2. Do I need house wrap under vinyl siding?
Yes. House wrap provides moisture protection and improves energy efficiency.
3. How long does vinyl siding last?
High-quality vinyl siding can last 20 to 40 years or longer with proper maintenance.
4. Should vinyl siding be nailed tightly?
No. Leave slight clearance under the nail heads to allow movement during temperature changes.
5. Can vinyl siding be installed over existing siding?
Sometimes. However, the existing surface must be flat, stable, and free from significant damage.
6. What temperature is best for installing vinyl siding?
Moderate temperatures generally provide the best installation conditions because vinyl expands and contracts with temperature fluctuations.
7. How much does vinyl siding installation cost?
Professional installation typically costs between $4 and $12 per square foot, depending on materials and labor rates.
8. Is vinyl siding waterproof?
Vinyl siding resists water effectively; however, proper house wrap and flashing remain essential for complete moisture protection.